| | | | |
 |
 |
 |
|
|
Tsukki
Start with a square piece of paper at least 6 inches across. It should be different colors on the two sides, preferably orange and pink. Also, get a piece of yellow paper, some glue or paste, and a black crayon!
|
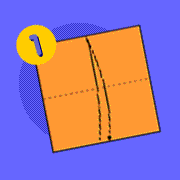 |
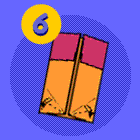
Fold the paper in half, and unfold, making a crease. |
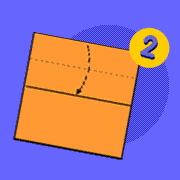
Fold the top edge of the paper to the crease made in step (1). |
 |
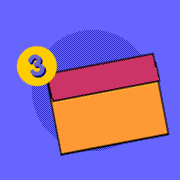 |
Now it looks like this.Turn the model over. |
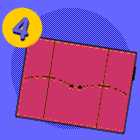
Fold the two short edges into the middle of the model. |
 |
 |
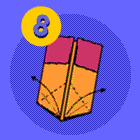
Fold and unfold the bottom corners to the gap at the middle of the model. |
Fold and unfold the bottom edges to the creases made in step (5). |
 |
 |
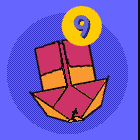
Inside reverse fold ("tuck in") both bottom corners along the creases made in stop (6). (We show one being tucked in here.) |
Open the bottom flaps as far as they will go to form the wings. |
 |
 |
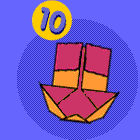
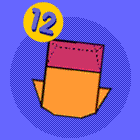
Fold bottom corner up to round the bottom of the model. |
Your model should now look like this.Turn the model over. |
 |
 |
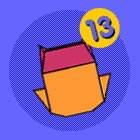
This is how the back side should look now. |
Pinch the top corners to form the "horns". |
 |
 |
The finished model. |
Decorate the model by drawing on the details and gluing on the eyes. You're all done! |
 |
|
 |
Origami designs by Joseph Wu. Joseph Wu is webmaster of The Origami Page and a member of the Japanese Origami associations Origami Tantei Dan and Nippon Origami Association.
|